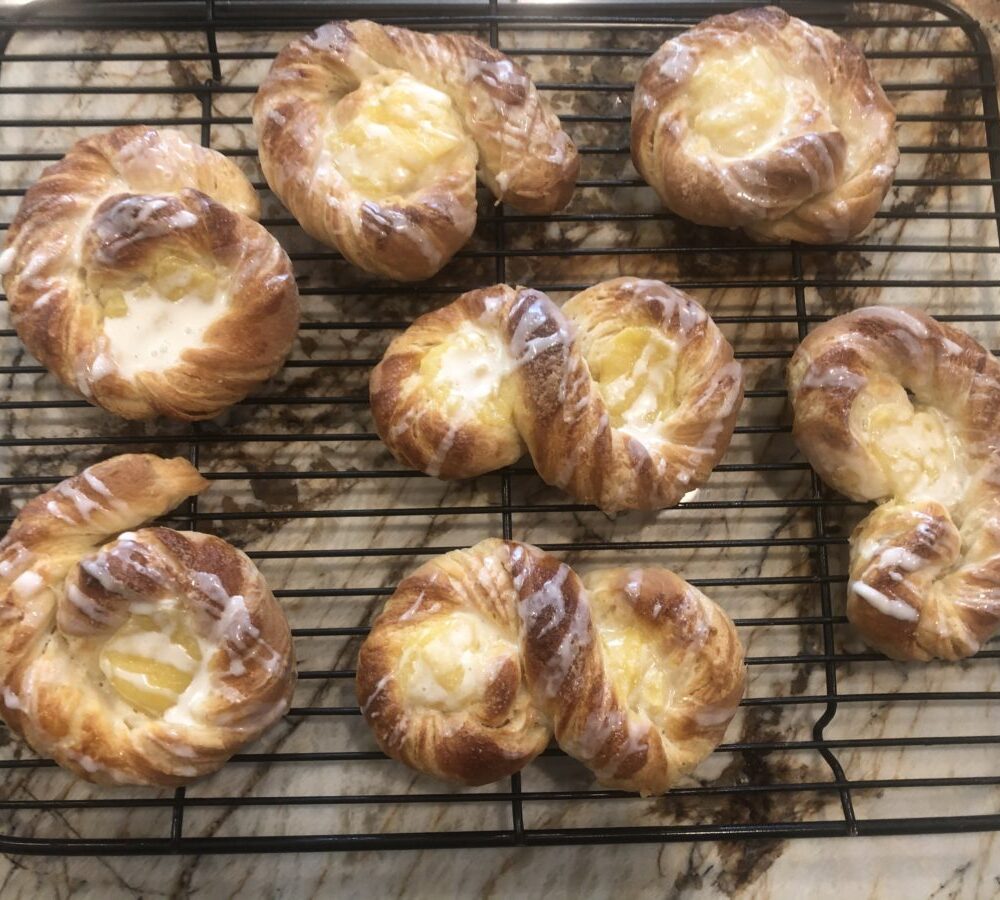
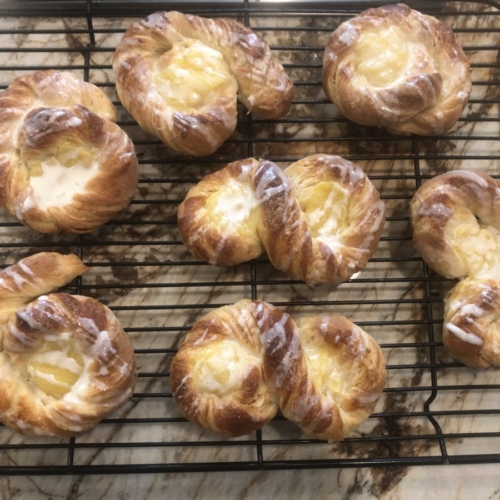
Classic Danish Pastry
My Dad made some of the best Danish pastry that I have ever tasted. In all my travels, I've tasted just a few that have come up to his standards. This recipe does take two days to complete, but it's worth it. The end result is a rich, buttery, flakey pastry with a touch of sweetness taken further by the fillings or additions you choose. I'm particularly fond of almond, but there are so many variations from which to choose. Preserves, custard, raisins and nuts are some that come to mind.
Ingredients
Pastry Dough
- 2 1/2 cup bread flour (300g)
- 1 cup pastry flour or cake flour(130g)
- 4 tbsp unsalted butter (57g)
- 1/4 cup sugar (45g)
- 4 1/2 tsp dry active yeast (14g) this is two packages of dry yeast
- 3 large grade A egg yolks
- 1 cup whole milk (237ml)
- 1 tsp salt (6g)
Butter Package
- 8 oz unsalted butter (228g) European Style Butter is a good choice
- 2 tbsp flour (18g)
Egg Wash
- 1 whole egg mixed with 1 teaspoon of water
Simple Powdered Sugar Glaze
- 1 1/2 cup powdered sugar (160g)
- 3 tbsp milk or cream
- 1/2 tsp vanilla extract or other flavoring (optional)
Instructions
For the Dough
- Warm the milk to between 90 - 100 degrees. Add the warm milk to your mixing bowl, the two packets of dry yeast and 1/4 cup of the bread flour. Stir to combine and let it rest in a warm spot for 10 to 15 minutes, or until the mixture starts to bubble.
- Once the yeast is activated, add the remaining bread flour, the pastry flour, salt and the sugar. Fit your mixer with the dough hook attachment and turn on to low speed. Beat the three egg yolks and while the mixer is running, add 1/3 at a time, incorporating each completely before adding the next third. Continue to beat another 3 to 4 minutes.
- Cut the butter into 4 equal pieces. The temperature of the butter should be such that you can press each piece into a thin slice. Which is actually about room temperature. Add one piece at a time, adding the next as the previous has been completely combined with the dough. When all four pieces have been incorporated, continue to mix for another 8 minutes, or until the dough is smooth and silky. This dough will be very soft, and a bit sticky, which is exactly as you want it.
- Using a bowl scraper, scrape the dough into a bowl which is large enough to hold the dough when it has doubled in size. Cover with plastic wrap and place in the refrigerator over night, or at least 12 hours.
The Butter Package
- Take the 8 ounces (228g) of room temperature butter, place it in the bowl of your mixer and add the 2T of either all purpose or bread flour. Fit the mixer with the paddle attachment, and mix the butter/flour at medium speed until completely combined. It should look smooth and creamy in texture.
- Using your bowl scraper, scrape the butter out onto a good size piece (about 10"x12") of plastic wrap. Place an equally large piece over the top, and press down.
- Using a rolling pin, roll the soft butter out to a shape of approximately 9"x8". You can use your hands to press it into a more perfect shape. Once it's about this size, and of even thickness, place it in the refrigerator for 30 to 45 minutes, or until it is firm, but still spreadable.
Putting It All Together
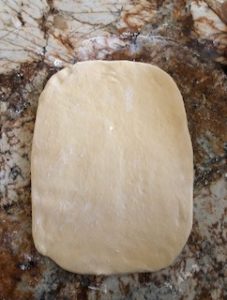
- After the dough has rested overnight in the refrigerator place on a floured work surface. Roll the dough out to approximately 10" wide and and 12" to 13" long. If you have flour on the surface, use a pastry brush to remove as much as possible. It is important to brush away surface flour between the folds. Excess flour between folds impedes the layering process.
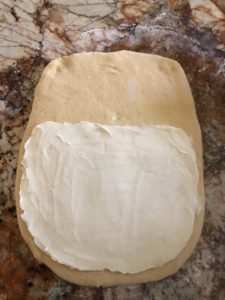
- Place the cooled butter package on the lower third of the dough, and gently spread to cover the bottom 2/3 of the dough keeping it about 1/4" from the edges. A flexible rubber spatula works very well for spreading the butter package.
- When this is done, fold the top 1/3 of the dough (the 1/3 that is free of butter)over over the top 1/3 of the butter package. Brush away any excess flour.
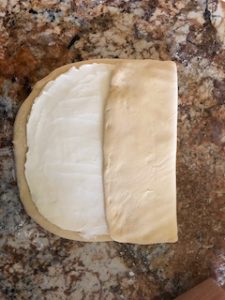
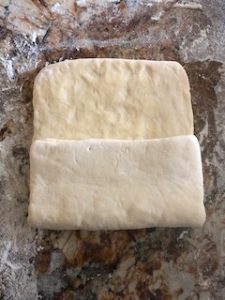
- Next, fold the bottom third (the part with the butter) over the top piece of dough. A bit like folding a business letter. Gently press the edges together, and using a rolling pin and your hands, press into a shape like that shown. (A rectangle of approximately 10" long and 5" wide) Wrap it in plastic wrap and place in your refrigerator for 1 hour.
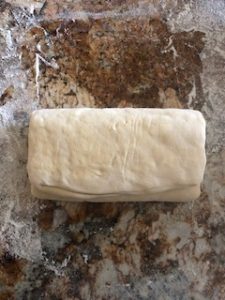
- Once the dough has chilled and the glutens have relaxed, place the piece once again on a lightly floured work surface. This will be your first fold. Remember, you are folding in a different direction for each of the three folds. A good way to remember is to always have the seam of the fold facing right, as in the photo.
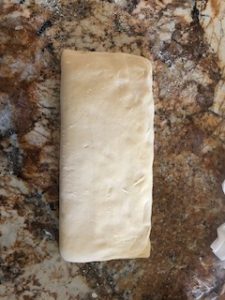
- Roll the dough out to a rectangle approximately 9" x 12". Use a pastry brush to remove any excess flour. Remember, if there is too much flour between the folded layers, they will not stick together and evenly rise during the baking process.
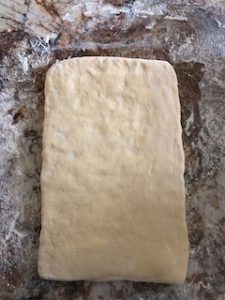
- You are once again doing the "business letter" fold. This photo shows the bottom 1/3 of your 9" x 12" sheet of pastry being folded over. You will brush off the excess flour, fold the top portion over the lower portion. Use your rolling pin and hands to form it into a folded rectangle, wrap in plastic wrap and chill for another hour. THIS IS FOLD #1. YOU WILL REPEAT THIS PROCESS TWO MORE TIMES FOR A TOTAL OF THREE FOLDS. The initial folding in of the butter package does not count as a fold.
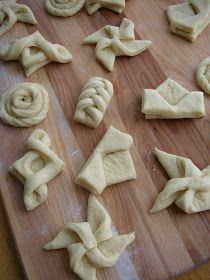
- After the third fold, allow the dough to rest one hour, and then your Danish Pastry dough is ready to use. Roll out the dough to approximately 1/4" thick . Cut into strips or squares and shape into individual pastries. Pieces may be filled with jam, custard, almond paste or any filling of your choice. At this point, they may also be frozen. Simply place on a baking sheet to freeze. Once frozen, you can store them in a zip lock bag for up to 6 weeks. When ready to use, remove from the freezer, place on a baking sheet, cover with plastic wrap and set in a warm spot for about 2 hours, or until they have doubled in size. Bake as directed below.
- Place individual pastries, about 2" apart on a baking sheet lined with parchment paper. Place the baking sheet in a warm spot and cover with plastic wrap or a tea towel. Allow to rise about 45 minutes, or until almost double in size. Gently brush each piece with egg wash, then place in a preheated 375 degree oven. Set the timer for 10 minutes, then reduce the heat to 350 degrees. Total baking time will be between 20 to 30 minutes depending on your oven. Pastries are baked when they are a rich golden brown on the top as well as the bottom.
- NOTE: Oven temperatures do vary. It's suggested that you check during the baking process to see if you need to adjust the heat.
- Remove from the oven, wait about 5 minutes, then brush or drizzle each with the Simple Powdered Sugar Glaze. Serve warm. Left overs should be placed in a plastic bag. When ready to eat, reheat in a 325 degree oven for 10 minutes. They may also be frozen, thawed and reheated.